In a recent post I mentioned that I had survived an Office 365 migration with only minimal scarring. We run HPE Content Manager which is "Enterprise Software". Just like the large government agencies that Content Manager is designed for it's big, slow, resistant to change, expensive, bureaucratic but yet incredibly despite all it's failings, it's occasionally capable of achieving great things like landing on the moon.
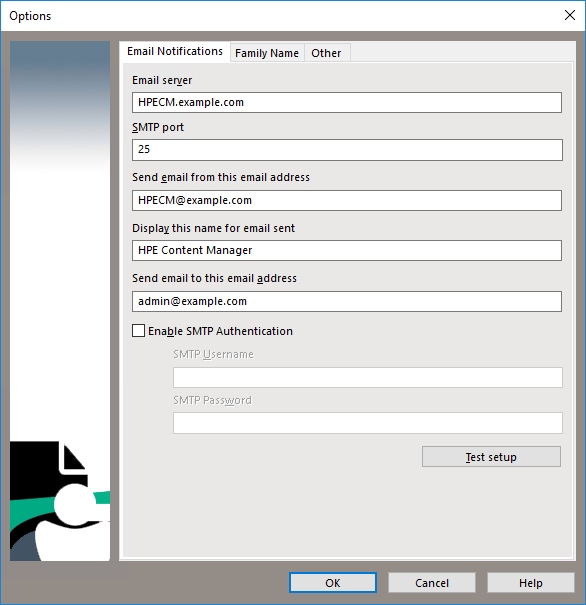
Anyway HPE Content Manager hasn't gotten around to implementing TLS before authentication for it's mail processing yet so it can't talk to office 365. So I was looking for a way to setup a mail relay but didn't want to setup a whole new VM just to relay mail.
I was surprised to find that Windows offers a mail relay built in to IIS.
Installing
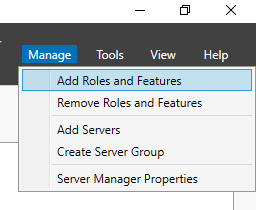
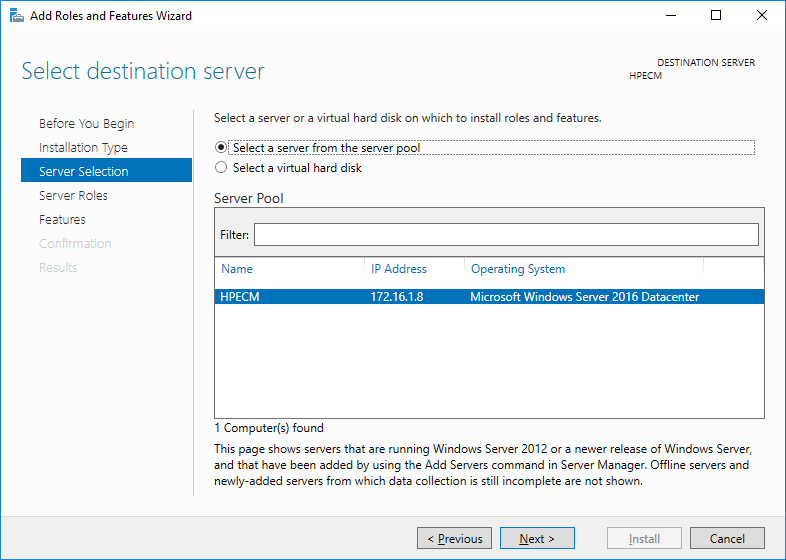
Go to server manager and select Manage > Add Roles and Features
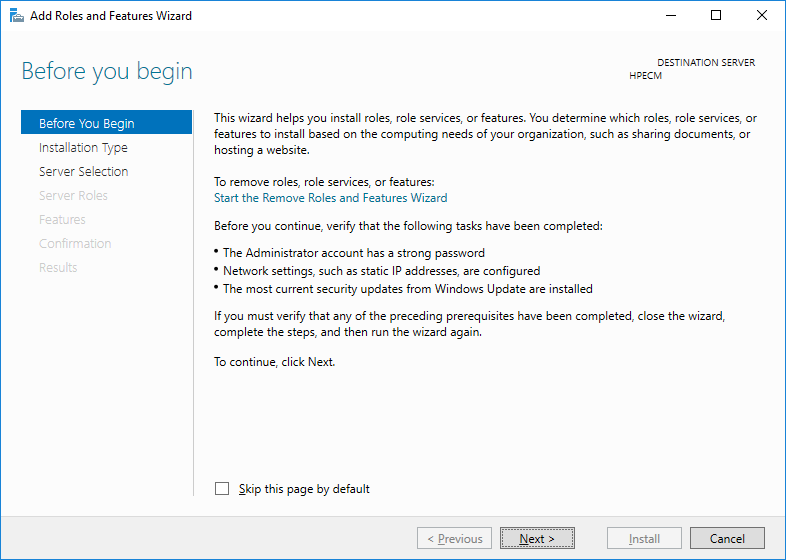
Skip past the before you begin page
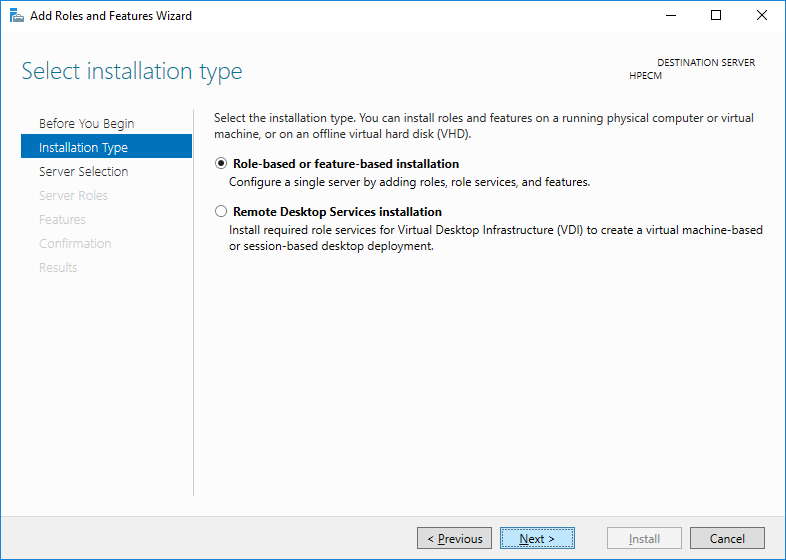
Pick "Role-based or Feature-based installation"
Select the local server
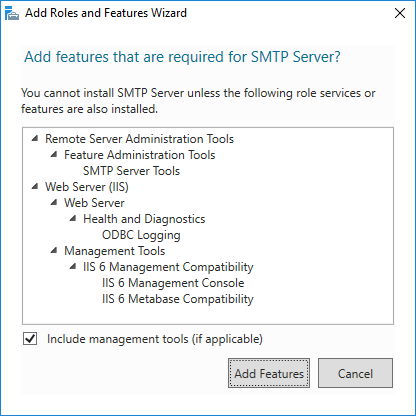
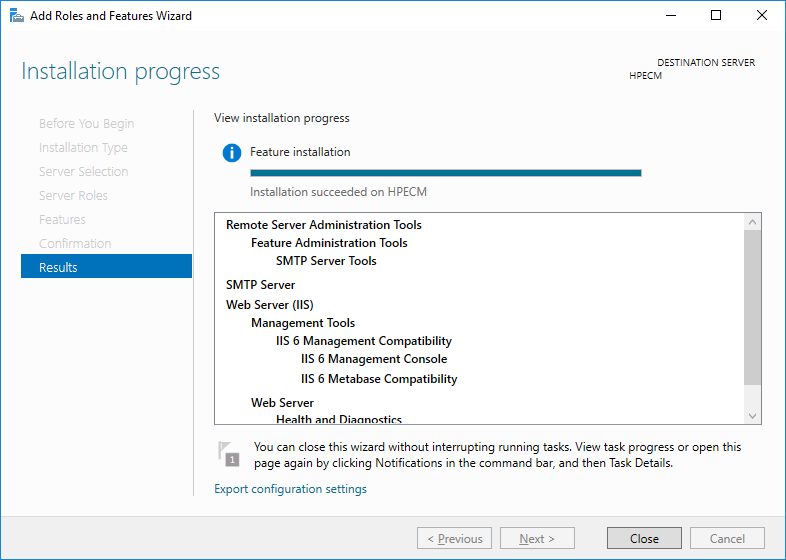
Add the "SMTP Server"
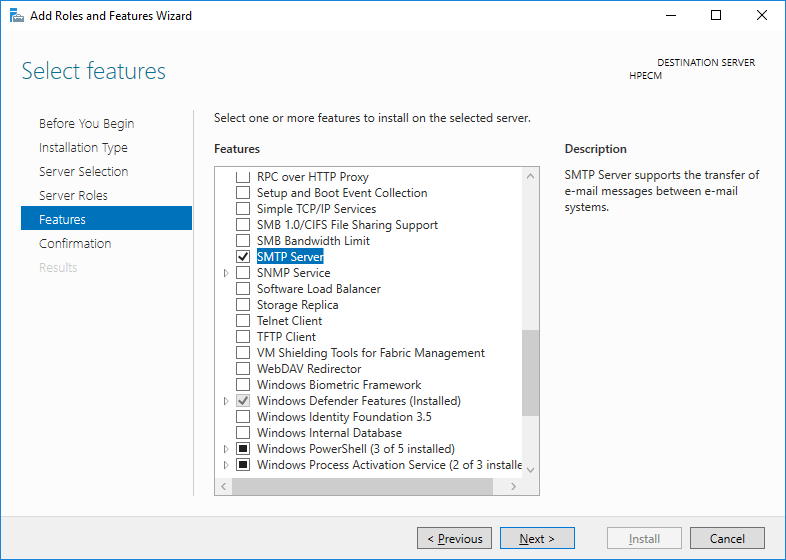
This will also install IIS 6.0
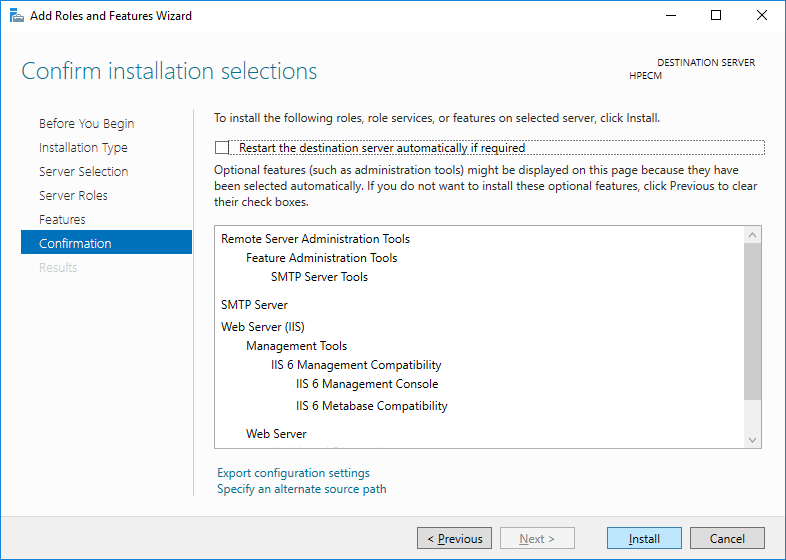
Confirm the setting and install
Settings
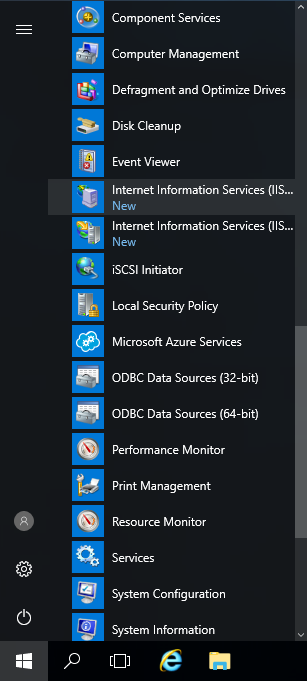
Once the SMTP Server is installed open IIS 6.0. If you have a website on your server (such as HPE Content Manager Web Client) you will see two versions of IIS.
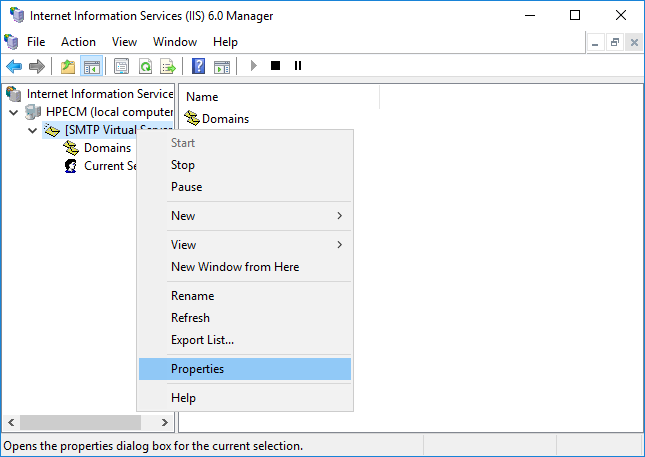
Right click on the SMTP Virtual Server and go to Properties
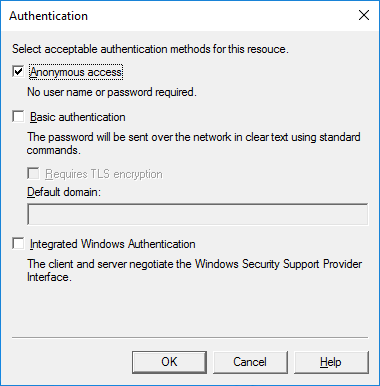
Under the Access tab select Authentication.
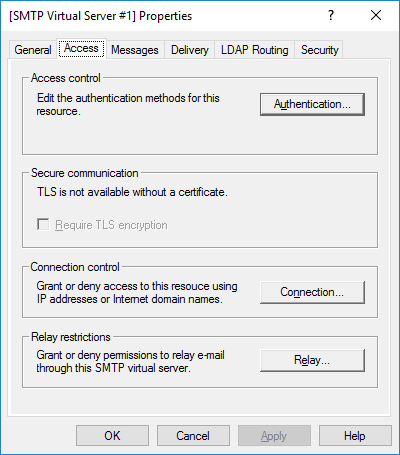
On the Authentication window, check that Anonymous access is available
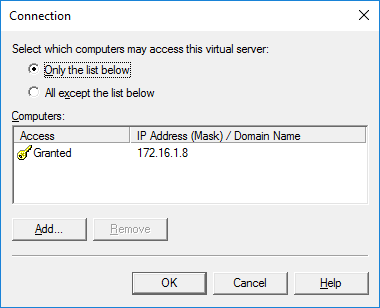
Next from the Access Tab select the Connections window and ensure that only the IP address you want can connect.
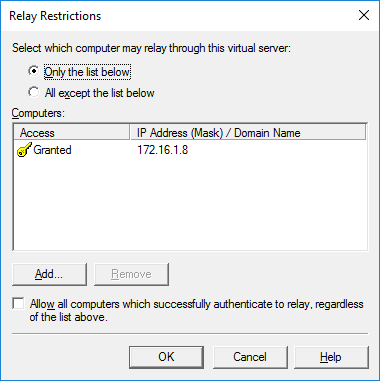
Then from the Access Tab select the Relay window and again ensure that only the IP address you want will be allowed.
Then go to the delivery tab, we are going to need the three buttons across the bottom.
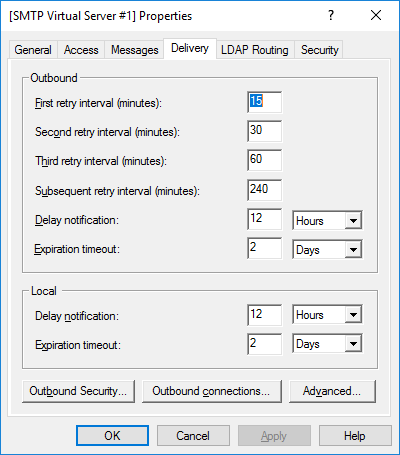
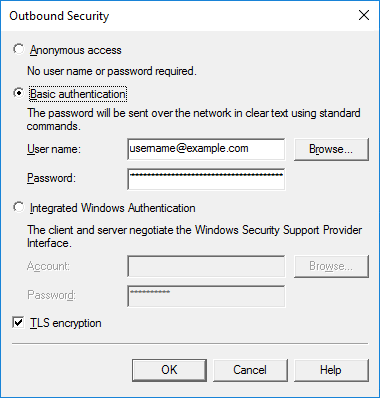
Under Outbound Security enter the user name and password and tick TLS encryption.
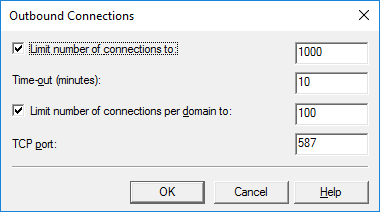
Under Outbound Connections change the port to 587.
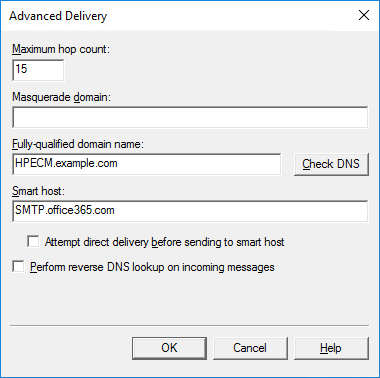
Finally under advanced set the smart host to SMTP.office365.com
Point Mail to the relay
Now you can point HPE Content Manager or whatever it is that you need to relay mail for, to your server.